Will you accept this (cheese) rose? If you haven’t
heard of this unique trend, you’re in for a treat. Slices of cheese are
delicately wrapped to make the shape of flowers, then garnished with edible herbs
for a stunning centerpiece fit for any cheese board or special occasion. And
with Wisconsin Cheese, these cheese flowers are sure to taste even better than
they look!
Whether they’re nestled onto a cheese board, popped into vases, or
handed out as hors d’oeuvres, cheese roses are an elegant way to enjoy the best
thing of all: cheese. We’ve put together a guide with all the best tips and
tricks for making beautiful, tasty cheese roses. It’s way easier than you’d
think — we promise!
The best cheese for cheese roses
Cheese roses are best made with young cheeses
that are springy and flexible, so you can roll the slices without tearing them.
Aged cheeses, while delicious, have less moisture which causes
them to be brittle and easily crack or crumble. Thin slices of a younger cheese are
best. Aim for around 1/8” thickness for best results.
While you can slice your
own cheeses, especially with a good cheese knife, we recommend making your life easier and ordering from a deli counter or local cheesemonger. They can slice the cheese easily and precisely for you, so you can
focus more on what really counts: what wine or beer you’ll pair with your soon-to-be cheese
roses!
How to make cheese roses
Making cheese roses is easier than you think!
If you can roll slices of cheese, you can do this. Here are the eight easy
steps to create a beautiful cheese rose.
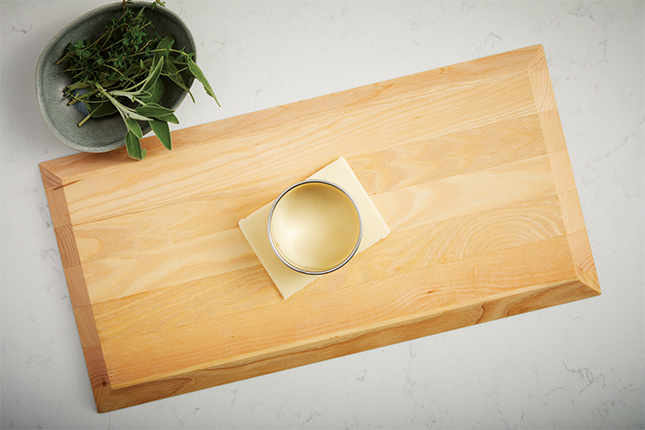
Step 1: Thinly slice a block
of Wisconsin Cheese, such as cheddar, fontina, gouda, havarti, or mozzarella, to
1/8-inch thickness (or ask your cheese shop for help). Use a glass or cutter to
cut the cheese slices into circles.
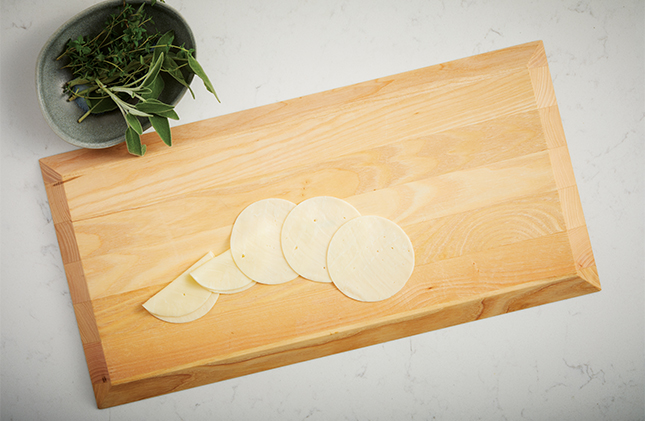
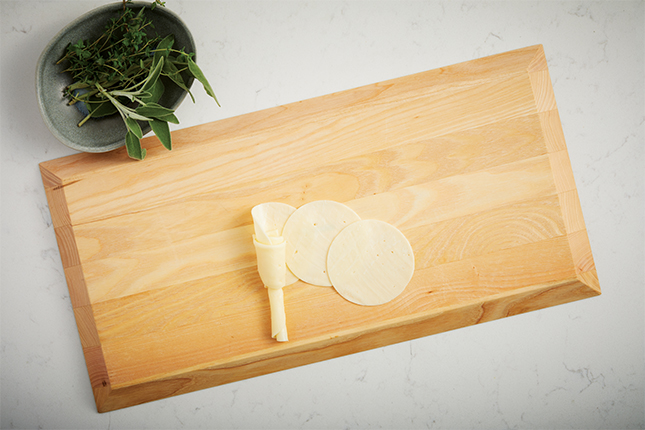
Step 2: Place a cheese circle on a cutting board and fold it in half. Add another folded slice, followed by three
unfolded slices.
Step 3: Roll a separate
cheese circle tightly to form a “stem.”
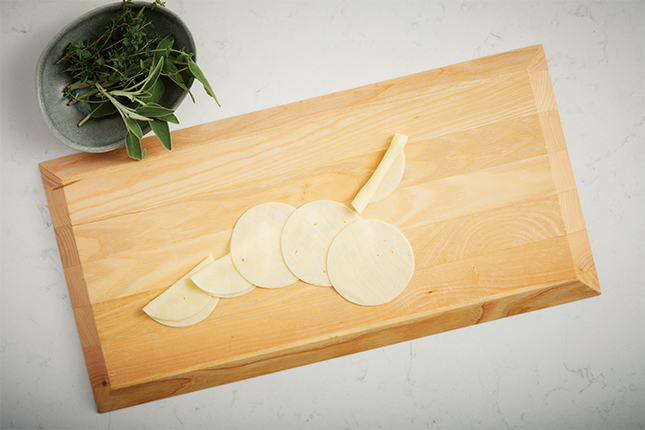
Step 4: Place the stem on the
left edge of the first folded slice. Working left to right, begin rolling
slices around the stem.

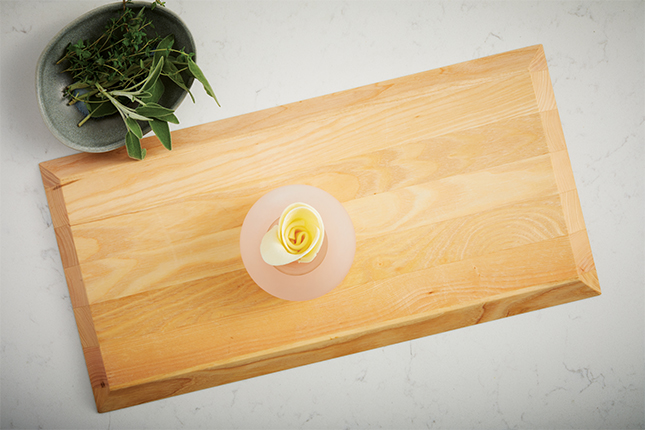
Step 5: Continue rolling,
keeping the stem near the center of the unfolded slices.
Step 6: Place the cheese
flower upright in a vase or glass. Open the “petals” by gently pulling back the top
edges of the cheese slices.
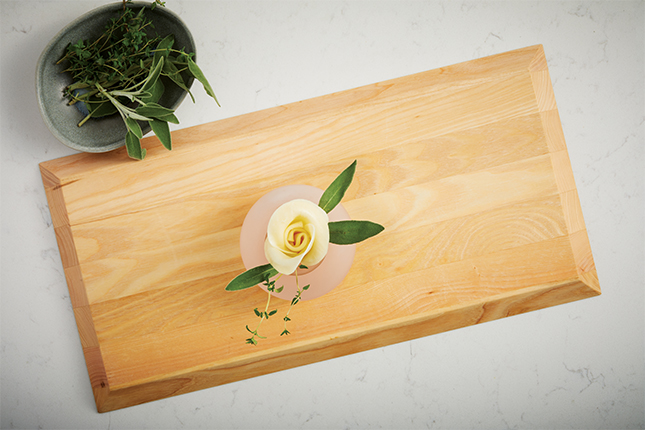
Step 7: Place fresh herbs
like basil, sage, or thyme for leaves.
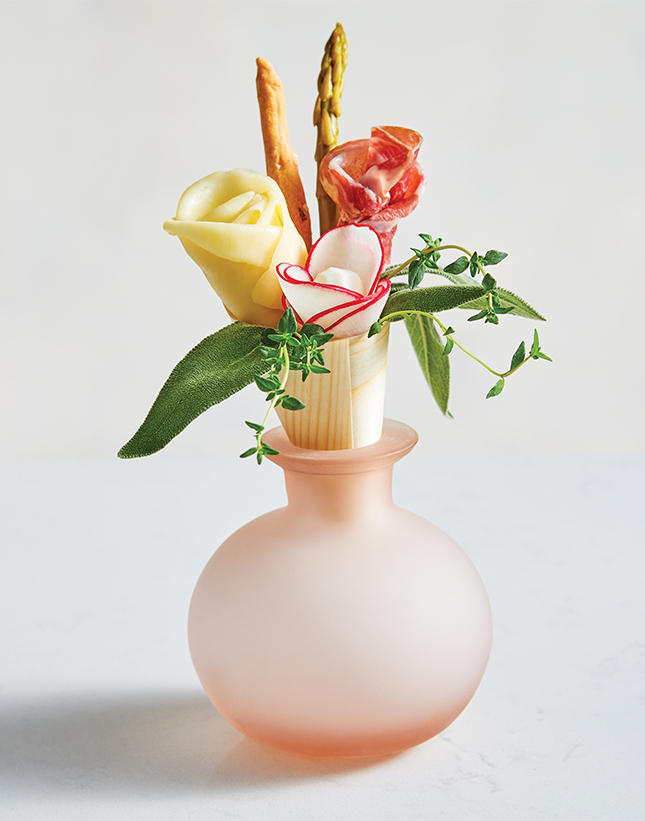
Step 8: Arrange the cheese flower
with other accompaniments like pickled asparagus spears, breadsticks, and
charcuterie.
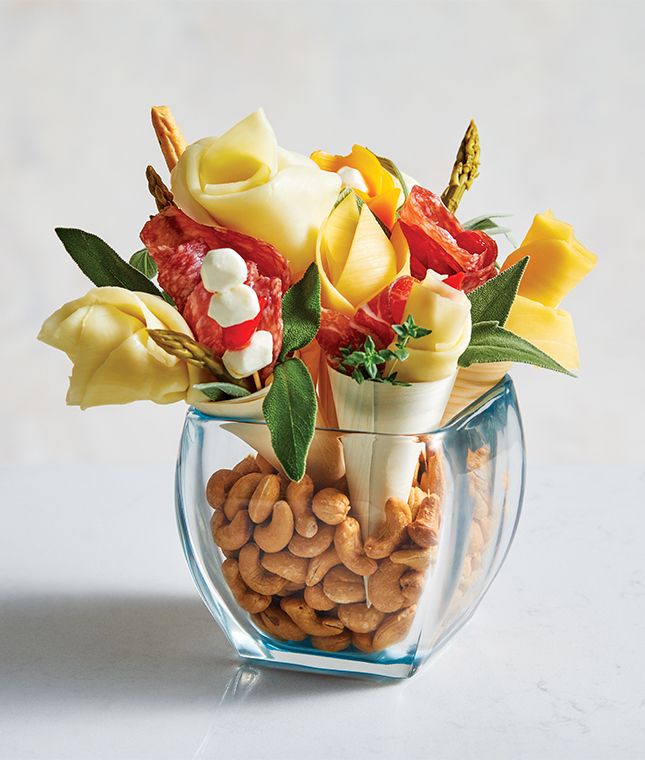
Serving cheese roses
The options for serving cheese roses are just about
endless. Cheese flowers can be a beautiful centerpiece for any cheese
board or cheese-themed meal. Tuck them into a charcuterie
board for an at-home gathering, or create a lush picnic box
for instant romance while on the go. Want to create unique hors d’oeuvres or a
memorable party favor? Make cheese bouquets!
Use double-thickness parchment
paper to create paper cones or use disposable bamboo wood cones. Using long
toothpicks, thread on mini mozzarella balls, veggies, or fruits before topping
with your cheese flowers. Tuck these into your cones, then fill in the gaps
with breadsticks and edible garnishes. Impressive, delicious, and easy!
Learn How
to Build a Perfect Cheese Board with our guide to really get things going!
Bloom and grow!
The only thing better than an actual bouquet of flowers is one
made entirely of cheese. Ready to make your own? Get all your favorite
Wisconsin Cheeses and cheese gift baskets delivered right to your door with our continuously updated
list of cheesemakers and retailers that allow you to order cheese online.
Award-winning Wisconsin Cheese is just a click away!
In the mood for something else? Check out our selection of
over 400 handcrafted recipes featuring Wisconsin Cheese to find the perfect
recipe to showcase your knowledge. If you’re looking for more cheesy
inspiration, be sure to follow us on Instagram or Facebook.